

Update 9/5/2025: Bad news. Since Sept 3rd, 2025, The Bee AI API, a critical part for the tutorial to work, has been offline. There’s no communication from Bee about when the API will be back online, if they plan on doing so as the site leading to that was taken down as well. So, this guide may be outdated.
With the announcement of Bee being acquired by Amazon, I decided that I will start looking into an alternative. But the data captured by Bee is still useful to me and it is MY data, so how do I get it out?
Well, there are several things you can do, but at the end of the day, the data is mostly a transcript and with context you programmed into Bee, it tells the story of what happened. So, if you can get the raw transcripts out, it will be just as useful. But how can you do it?
Well, thanks to this online application: Buzz for Bee (https://buzz-for-bee-ai.lovable.app), you’ll be able to export all your data and keep it for your archive. And this is a step by step guide to how to do it.
What you need:
- An Apple Account to access Bee’s API code
- A Buzz for Bee Login
- About 30 minutes
Step-by-Step Tutorial
Login into Buzz for Bee
https://buzz-for-bee-ai.lovable.app
This is the web app you’re using. Basically, it’s the same Bee application, but you’ll be using your web browser to interact with it. There are additional things you can do with it (should you decide to stay with Bee, that is) such as validate facts that Bee captured, add tasks and conjure up projects. However, let’s not get ahead of ourselves. We’re here to get the data.
You can’t do much at the moment because while you did create an account, it’s not connected to Bee.
So, the next step is we need to get an API code from Bee.
Head to Bee AI Developer Board
https://developer.bee.computer
Head over to the developer’s dashboard on Bee’s site.
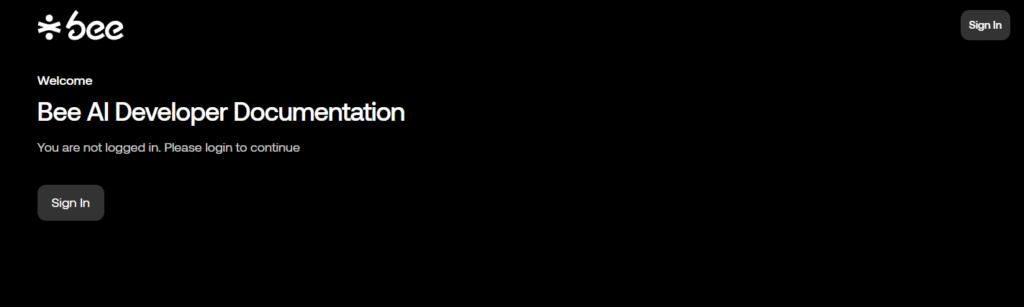
Clicking on “sign in” will take you to the Apple Account. You’ll need an Apple account to get into your Dashboard. Now, what if you don’t have an Apple account and you got an Android device and use a Google login? Well, sign up for an Apple account, but make sure to use your Google login’s email address so that Bee knows what account to look for.
You don’t need an Apple device to create an account. (I don’t have an Apple device)
https://account.apple.com/account – Just head here to create an Apple account. Again, make sure you’re using your Google account’s email as the login/email address so it can be assigned to your Bee account.
Once you have your Apple login, this screen should pop up. If it doesn’t, go to Bee Developer link sign in until you get to this screen.

Press continue.
Time to get the API Code

Once you log in, it’s time to get the API Code, or in this case “API Key”. Click on “API Keys” on the side bar.
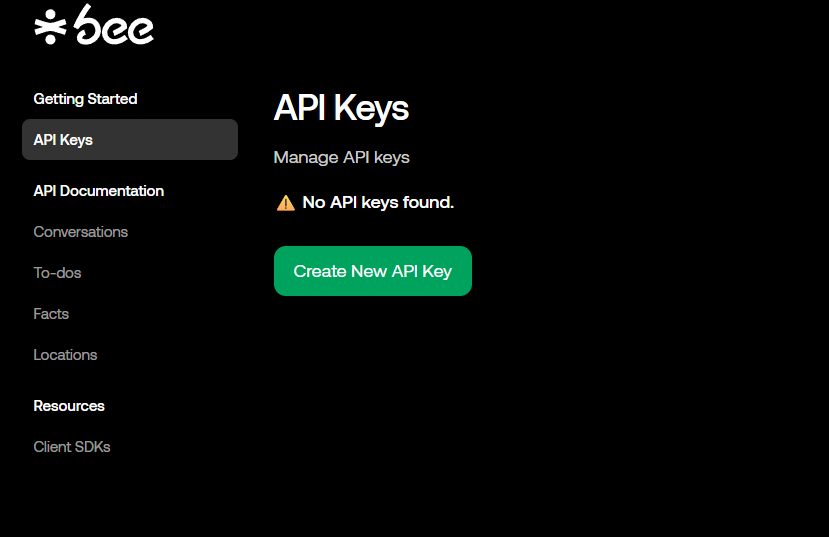
Next, click on “Create New API Key”. It will generate an API Key, which you’ll then copy by clicking on copy.

Now, you can safely close this window, because we got what we need to get the Buzz App to work.
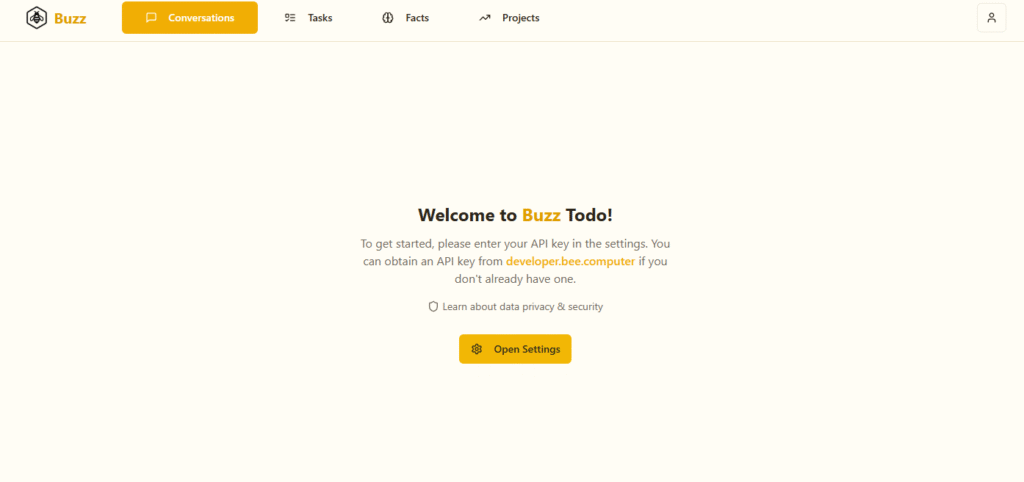
Head Back to Buzz

Once you head back into the Buzz app, you’ll see an “open settings” button. Click on that and you’ll see the above screen. Simply paste your new API key into the Bee API Key section and save it.
Once you do that, click on “Conversations”.
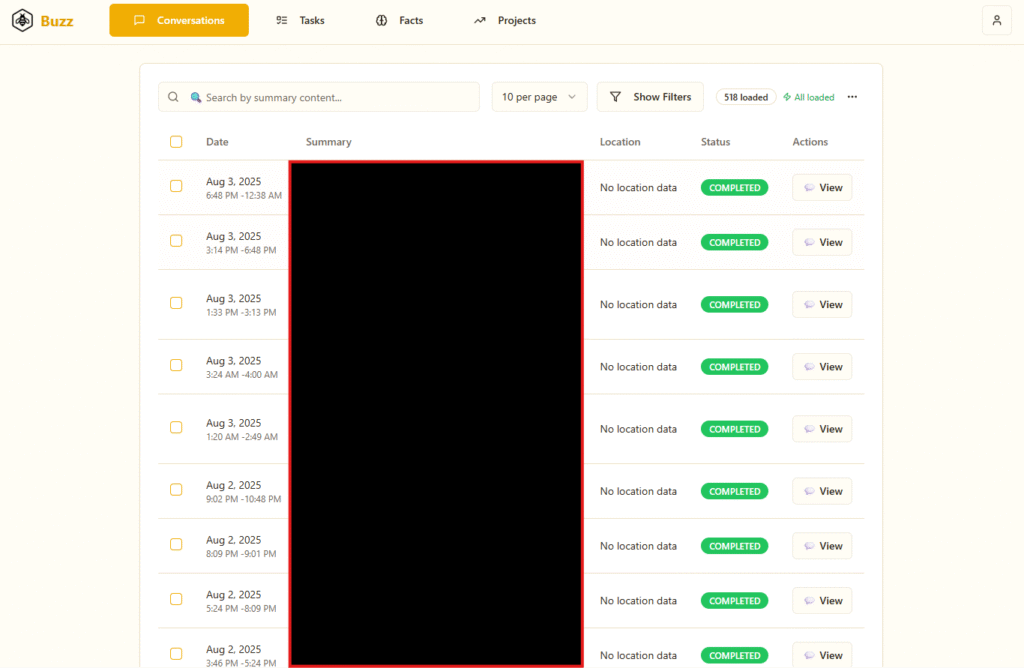
Now, you’ll start to see familiar data. You can click around the summaries if you like, but if you really want to start backing up your data, here’s how you can do it.

- Select the “10 per page” and increase it to how many conversations you want to see per file. You can go as high as 50 or as low as 5.
- Next, you want to go to the “select all conversations” toggle. Note: you can only export up to 50 conversations at a time, so if you have a lot of conversations, it’s best to just do the 50 at a time vs. one at a time. However, this is totally a personal perference.
- Once you set those up, click on the “…” menu and then finally, click on export.
Wait a while as the app complies the data and then download it. It will be saved as a markdown file, which is a text file, but with markdown formatting language. You’ll still be able to read it using a text editor, but you may want to use a MD file editor for formatting. It’s a universal format, so if you want to feed it into something later, you can totally do that.
Once you download the file, clear the selection, go to the next page and repeat the process until you download all the data.
How the data is organized

Here’s the rub: the download is going to name the files the same name: conversations-export-YYYY-MM-DD.md (The year, Month and Date you’re exporting the file) If you’re downloading all the data, you may want to rename the data. Otherwise, you’ll get an additional (1), (2) and so forth to prevent overwriting.
Each file will have the following:
- Date and Time of the Export.
- Total Conversations within the file.
- Table of Contents
When you’re using an MD viewer (or a text editor that can display MD language), you’ll see links going to each conversation. And each conversation features:
- Title
- Date and Time
- Duration
- Location (if captured on an Apple Device. Android users, it will always say “no location data”. Sorry.)
- Status of Conversation
- Summary
- Atmosphere
- Key Takeaways
- Transcript of the conversation
Double Check all the files
Once you have all the files, double check them to make sure you got everything.
You can review the files using a text editor such as Notepad, but if you prefer to review the files using an MD viewer and editor, a personal editor I use is Obsidian, a free to use (but not open-sourced) Markdown editor and knowledge based. Another Logseq, a similar knowledge based app, but opensource. Both apps are private and don’t store your data online (at least not with it’s initial setup).
Close up shop (on the Buzz App. Totally Optional)
When you’re review your files and made sure you backup to a secure spot, the last thing you want to do is delete your data from Bee.
First, go to settings of Buzz App:

Delete the API code and then delete your account… if you want.
This step is only needed if you have fully decided to get rid of your Bee account and you have no plans to use Bee beyond this point. Once you delete the Buzz account, then you can safely delete your Bee account by heading to the settings within your Bee app and scroll down until you get to the bottom and click on “Delete Account”
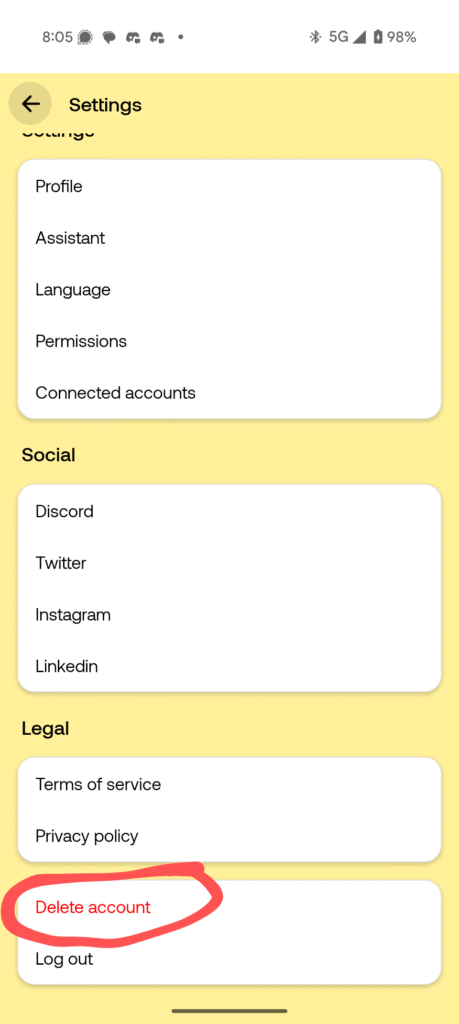
Remember, this is the nuclear option. Once you delete your account, you can’t restore the backup data should you change your mind.
But these are the steps to backup your data. If you have any follow questions/concerns, let me know!
While you’re at it, if you like this content and want to be updated for more of it, especially a full review of my Bee replacement, sign up for the newsletter!